Build Your Skills
Learn music theory Train your ears Track your tempoRead Now
Get the Newsletter
Categories
- | BeatMirror (10)
- | HearEQ (11)
- | Waay (22)
- | WaayFinder (1)
- Audio (16)
- For musicians (34)
- Guitar (2)
- Music theory (15)
- News (42)
- Startup stories (2)
- Tutorial (4)
Keep in Touch
About Ten Kettles
We love music, we love learning, and we love building brand new things. We are Ten Kettles.
Read more >-
April 28, 2015
Tutorial: How to EQ an audio file
In past articles, we’ve talked about EQing for live performance, the basics of EQ, and EQing your instrument in a band. Now let’s see how to EQ a sound file. Feel free to use either your own sound file or the guitar sample we provide below. Let’s get started!
1. Get the DAW
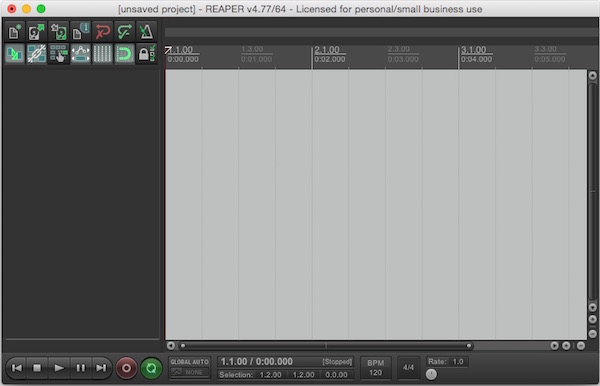
First, you’ll need some “DAW” software, like Protools, Logic, or Reaper. “DAW” stands for “digital audio workstation” and is essentially a piece of software that lets you a) edit individual audio tracks, and b) mix them together. If you want to lose 24 hours, spend some time googling “Protools vs. Logic” or “What’s the best DAW?” In the meantime, we’d suggest going with Reaper. The evaluation version is completely functional, completely free, and available for Mac or Windows. To get started, download it at http://www.reaper.fm/download.php, install it, and then open it up. You should then see a window that looks like this:
2. Add a track
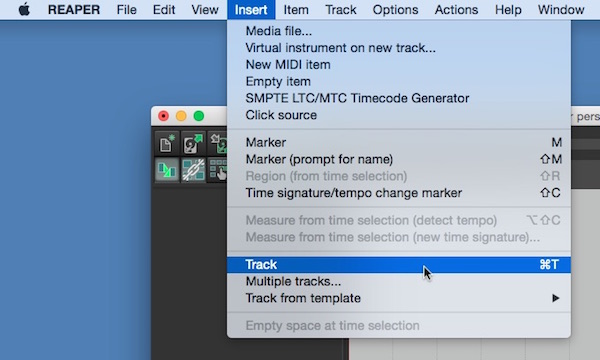
First, you’ll create an audio track to work with. A track is kind of like a slot for an audio file. For example, a basic singer-songwriter project could have two tracks: one for vocals, one for guitar. A full band project could have upwards of 12 tracks (or many more): vocals, guitars, bass, one for each drum, an overheard mic, and so on. We’re not doing any mixing here, so we’re happy with just the one track. Click Insert->Track.
3. Bring in your audio file
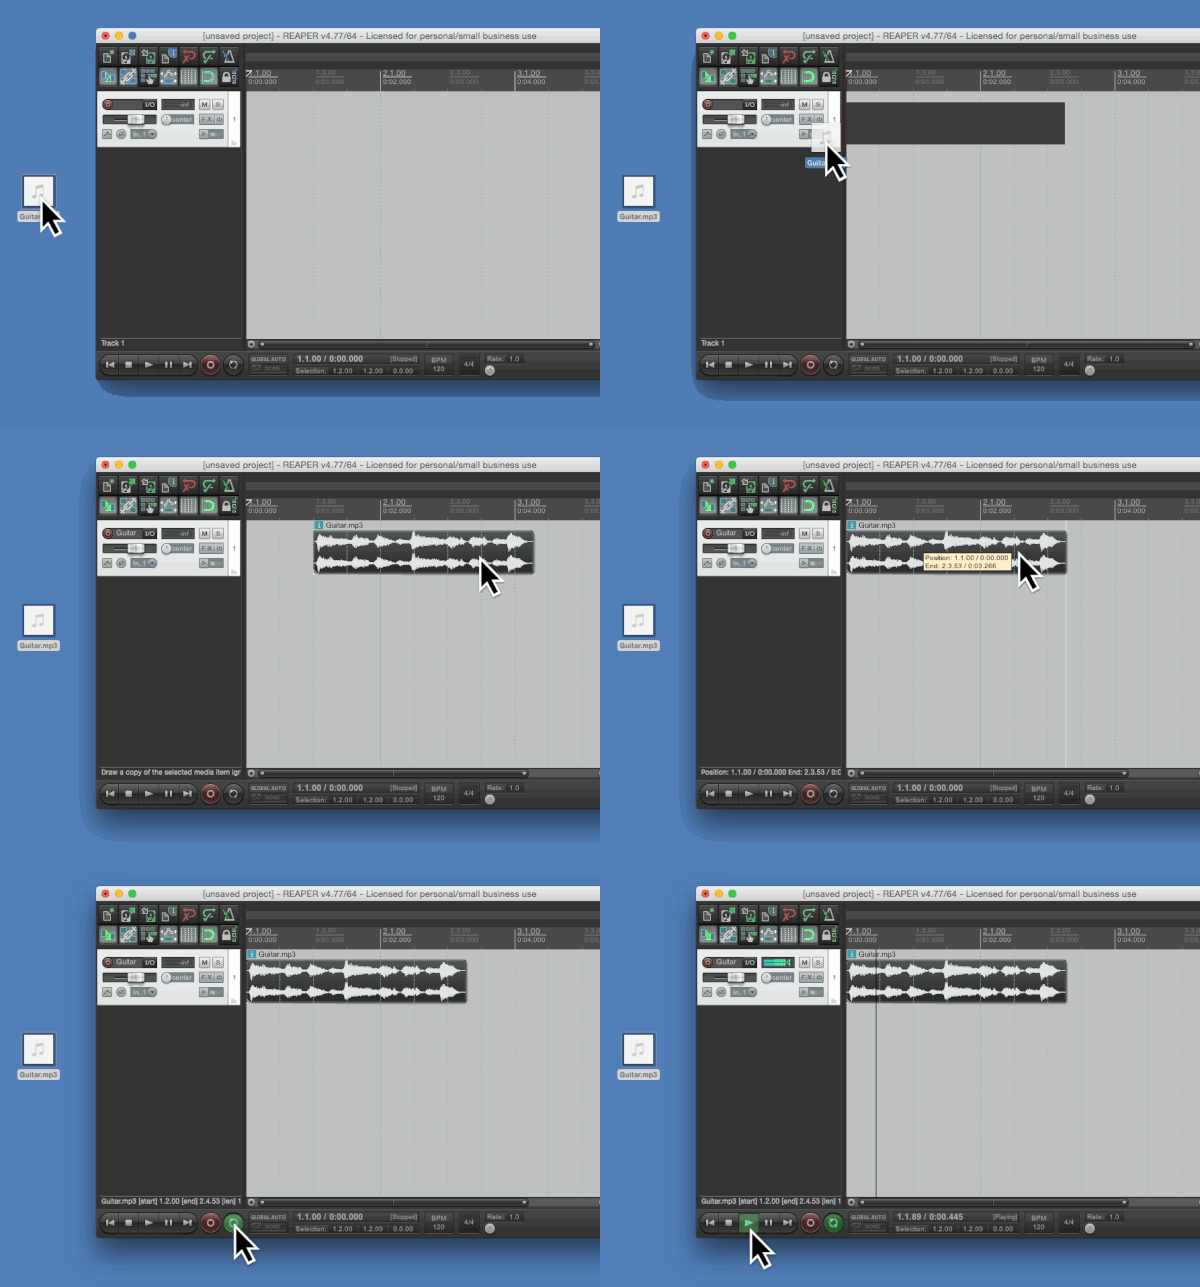
Drag your audio file right into the track. Looking for a file to use? Here’s the MP3 we used in the audio primer articles. (Right-click or control-click (Mac) to download.) After you’ve added the file, you can then drag it to the beginning of the track as shown in the clip below. Then, turn on repeat and press the play button!
4. Add the EQ effect
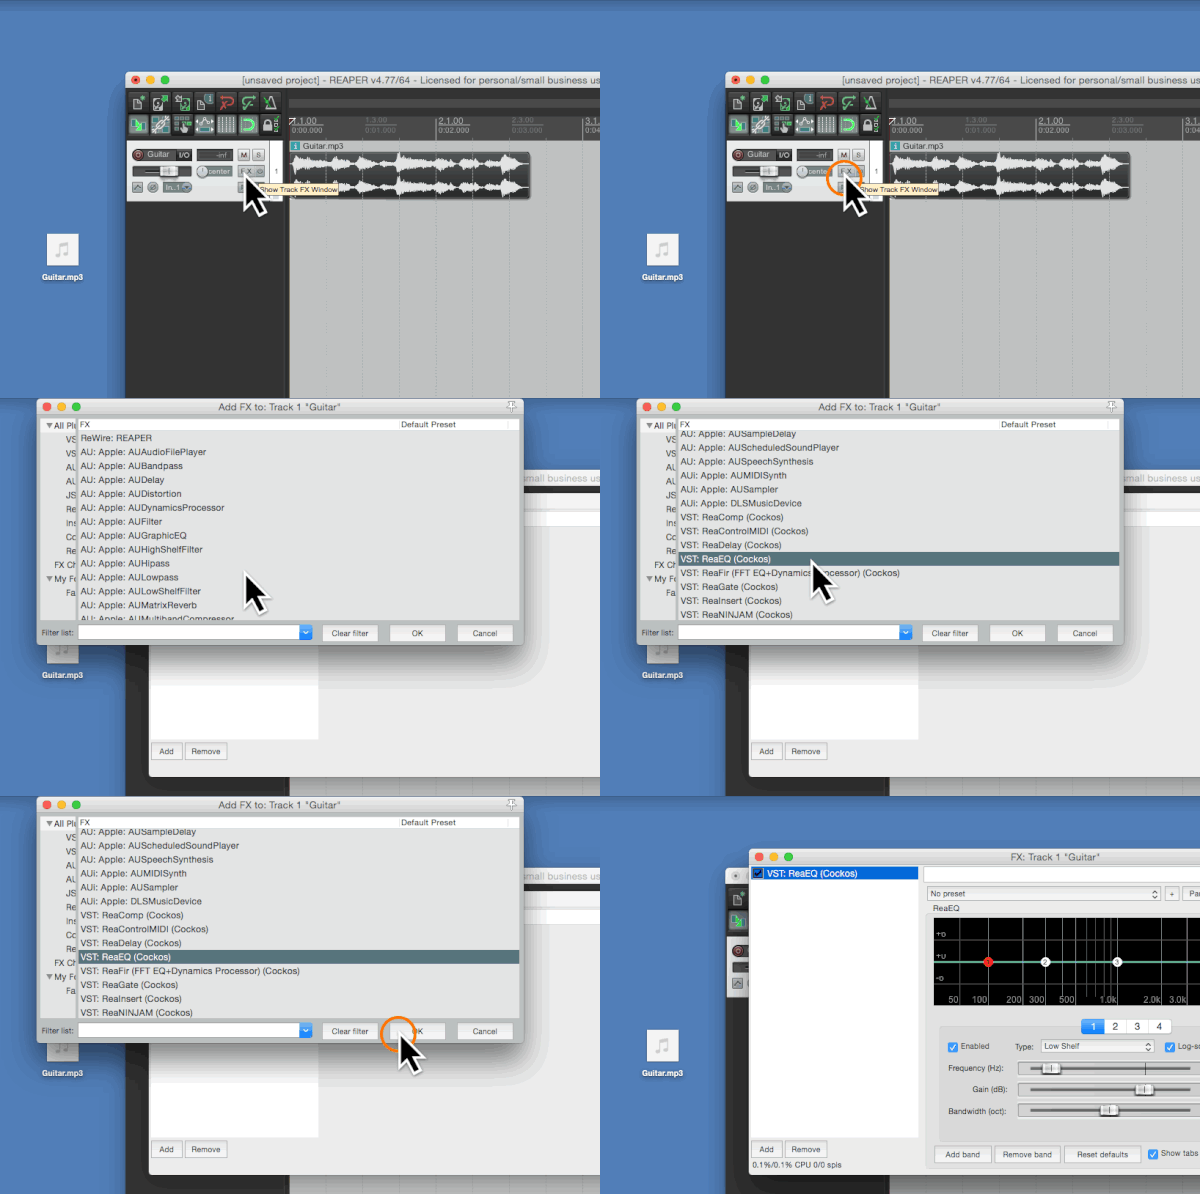
As we mentioned at the beginning of the article, a DAW is used to edit tracks. One very common way to edit a track is to add effects (“FX”), like EQ. To add EQ to our track, click the “FX” button, choose the VST: ReaEQ (Cockos) effect, and then press OK. There are various EQ effects we could use—parametric, graphic, and so on—but to keep it simple we’ll stick with this one. (Want to learn more about EQ types?)
5. Start EQing!
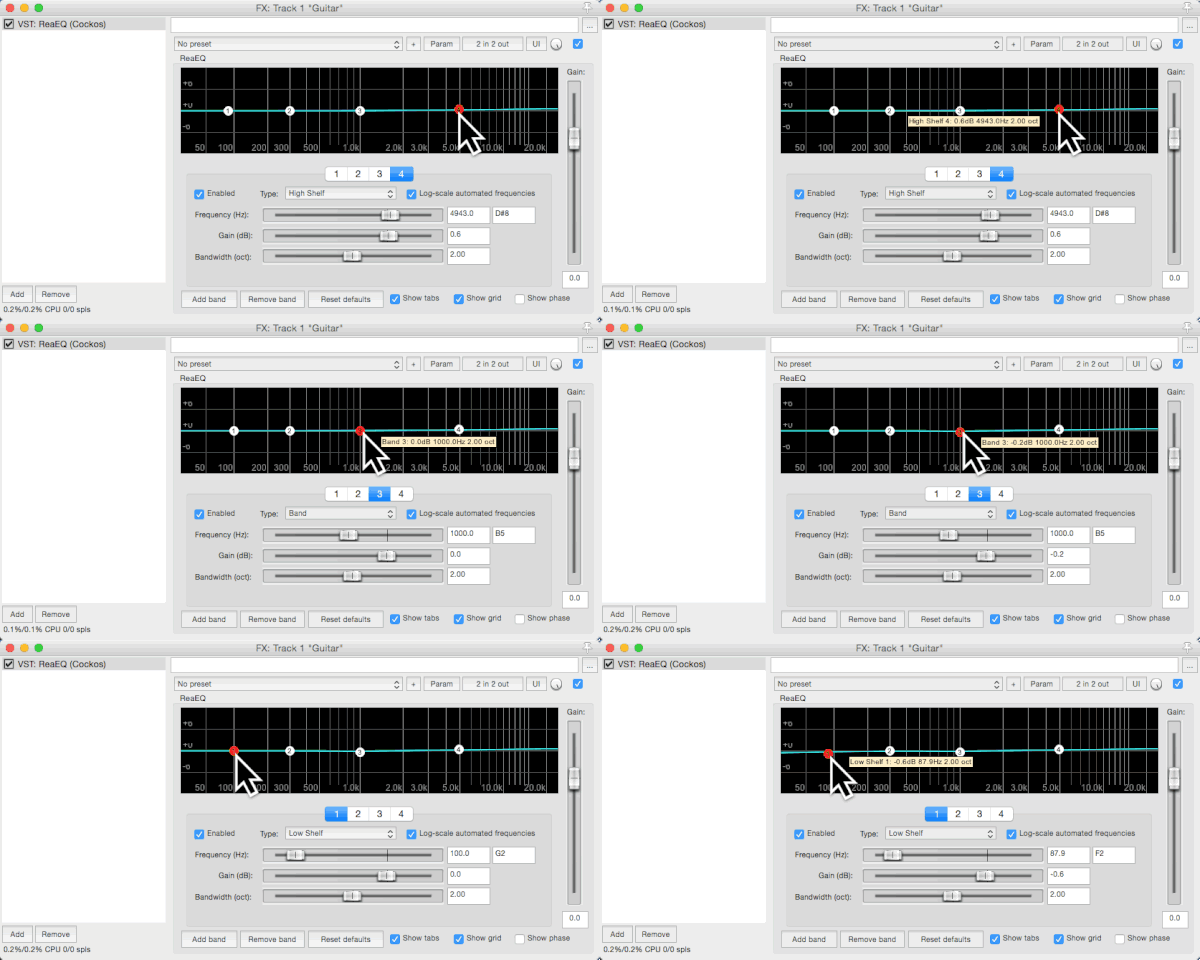
Now we can start EQing. Make sure your audio is still playing, and then add some highs by dragging up the right EQ control. It should start to sound pretty crisp, even tinny. Now drag it back to zero. Then drag down the third control to cut out some mids. A little reduction in mids can clear up a muddy tone or reduce nasal sound in a vocal track. Want to cut out some low-end to leave room for a bass guitar (or tuba?) in your recording? Just drag down the first control.
6. Save your changes
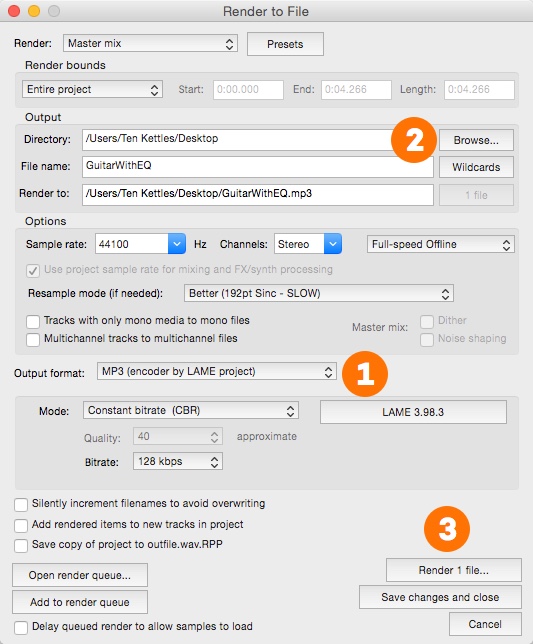
OK, so you’ve imported a sound file and applied some EQ effects. Now you can save all of your changes into a brand new audio file. This process is called rendering. To do this, just click File->Render and then select MP3 (encoder by LAME project) as your output format. Finally, choose your filename by pressing Browse->Browse for file. Click the Render 1 file button and you’ve got yourself a new sound file!
Congratulations, you’re all done! In this tutorial you installed a digital audio workstation (DAW) called Reaper, imported your own audio file into a track, applied some EQ, and then rendered a brand new audio file. What’s next? If you want to develop your EQ skills, we think ear-training is one of the best things you can do. That’s why we built an ear-training app for iOS called hearEQ. Learn more and watch the video here. Want to read more about audio? Check out all our audio articles here.


Comments